"I built a Figma plugin using AI and saved a week of work"

"I’m a UI/UX designer and recently faced a daunting task. Imagine updating nearly 200 design token descriptions in Figma—colors, spacings, borders, you name it. Manually, that kind of work could consume 3-6 full days (40+ hours!) of meticulous, mind-numbing effort. It's not exactly my idea of fun, and it's not the best use of time. There had to be a better way, right?"


Author: Eduard Chirileac, UI/UX Designer

Eduard, UIUX Designer

Well, spoiler alert: there was! By harnessing the power of AI, I managed to automate this workflow and cut those several days down to just 3-4 hours. Yes, you read that correctly. In a single afternoon, I got it all done. How? I combined two AI tools—Claude (an AI chatbot by Anthropic) and Cursor AI (an AI-assisted code editor - to build a custom Figma plugin that did the heavy lifting for me. This is the story of how I did it, with a step-by-step breakdown of the journey. Grab a coffee, and let’s dive in!

The lightbulb moment: AI to the rescue

This adventure started with a simple realization: I was spending too much time on repetitive design tasks. I’d been following AI news and chatting with colleagues about the latest AI tricks. I even saw some demos at a Design Innovation (internal company event) where people used AI to generate UI code. That got me thinking... why not use AI to handle some of my design documentation chores?

The idea clicked when I was neck-deep in defining those Figma design tokens. Writing descriptions for each token one by one felt like reinventing the wheel hundreds of times. I thought, “Hey, I talk to AI bots every day for fun and research. Maybe one of them can help me describe these tokens?” At the same time, I knew I could script a solution to update the tokens in Figma automatically if I had all those descriptions. That’s where the second AI came in: an AI pair programmer to help me write a Figma plugin.

So the plan was set: Claude would generate the content (token descriptions) and Cursor AI would help me code a Figma plugin to apply that content. It was time to put this plan into action.

Step 1: Let Claude write the boring stuff

First up, I enlisted Claude (Anthropic’s AI assistant) to handle the tedious writing. If you’ve never used Claude, it’s similar to ChatGPT - great at understanding context and generating text, but also capable of processing images and files if needed. My goal for Claude was straightforward: scan my design components and generate descriptive text for each token (for example, a color token might get the description “Primary brand color used for call-to-action buttons”).

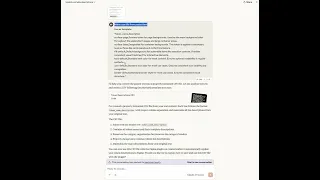
How did I do this? I literally showed Claude what my UI looked like. I uploaded a few screenshots of design components and prompted Claude in plain English, something along the lines of: “Here are various UI components with color, spacing, and border tokens. Please generate a short, clear description for each token you identify.” Claude took it from there, analyzing the visuals and my request. After a bit of back-and-forth (tweaking prompts, clarifying here and there), Claude produced a list of token descriptions that felt spot-on.

transcript of Claude chat about design tokens descriptions

I then asked Claude to format those descriptions into a CSV file (since I knew the plugin would need to read a CSV). In no time, I had a neatly organized CSV containing all ~200 tokens and their shiny new descriptions. To put it in perspective, with Claude, I accomplished in 1 hour what could have taken me 4 to 5 days of writing. I was already feeling the excitement — and a bit of relief 😅. With the content ready, it was time to tackle the next part: creating the Figma plugin to use this data.

For those interested in the nitty-gritty of my conversation with Claude, I had a full chat transcript (see gif above) where it generated the token descriptions. It was like pair-writing with an AI – pretty cool!

Step 2: Setting Up the Figma Plugin Project (in Minutes, Not Days)

Now that I had the token descriptions in hand, I needed a way to quickly update the tokens in Figma. Enter Figma Plugins. If you haven’t made a custom Figma plugin before, don’t worry – it’s not as scary as it sounds. Figma actually makes it super easy to get started with a template. Here’s how I set up my plugin project:

  1. Create a new plugin – In Figma (desktop app), go to the top menu and select Plugins → Development → New Plugin…. This is how you start any custom plugin.
  2. Choose a template – Figma will ask what type of plugin you want. I picked “With UI & browser APIs” (sometimes called “Custom UI”). This basically gives you a boilerplate project with both a UI file and the main code, which is perfect since I needed a custom interface (to select the CSV file) and full access to the Figma API.
  3. Name your plugin – I gave mine a meaningful name (something like “Token Descriptions Updater” – not very catchy, I know, but it does what it says!). You can also add a short description of what it does.
  4. Choose where to save – Figma then asks for a folder on your computer to save the plugin files. I chose a convenient location and hit Save. Figma generated a project with some starter files for me.
  5. Review the boilerplate – The template comes with files like manifest.json (contains metadata), ui.html (the plugin’s interface HTML), code.ts or main.ts (the plugin logic code), etc. At this point, I had all the pieces I needed to start coding the real functionality.
step-by-step plugin setup inside Figma

That’s it! In just a couple of minutes, I had a basic plugin structure ready to go. No coding yet — Figma handled the initial setup and gave me a foundation to build on. The next step was to actually write the code that would read my CSV and update all those tokens. And as a designer who writes code just occasionally, I was more than happy to let an AI assistant help me with the heavy lifting here. 😎

Quick note: If you attempt this, remember you must use the Figma desktop app to develop plugins; the web app won’t work for testing local plugins.

Step 3: Meet Cursor AI – My AI pair programmer

With the plugin structure in place, it was time to write some code. Now, I can write JavaScript/TypeScript and have built basic plugins before, but writing a script to update 200 tokens correctly can get tricky. I figured, why not use an AI co-pilot to speed this up and avoid mistakes? This is where Cursor AI comes in.

logo of Cursor AI code editor

Cursor AI is an AI-powered code editor (think of it like VS Code with a super-smart assistant built in). I had heard good things about it, so I decided to try it. I opened the plugin project folder in Cursor, ready to pair program with an AI. Here’s a quick rundown of what Cursor AI does and why it’s fantastic:

  • Code Suggestions & Generation: Cursor can auto-complete code and even write entire snippets if you just describe what you want. It’s powered by advanced language models, so for example, I could write a comment like “// TODO: read CSV and update tokens in Figma” and Cursor would suggest code to do exactly that. Magic!
  • Context-Aware Edits: One of the coolest things is that Cursor understands your whole project. It knows about all your files, so it can make coordinated changes. In my case, the plugin had multiple files (UI HTML, TypeScript code, etc.). I could ask Cursor to, say, “Add a file picker to the UI and handle the file in code,” and it would modify both the HTML and the TypeScript accordingly. No need to manually open each file and update them one by one.
  • Natural Language Chat: Cursor has a chat interface where you can talk to it about your code. I could ask, “How do I parse a CSV in TypeScript?” or say, “The plugin needs to load this CSV and map values to Figma tokens. Can you help with that?”—and it would answer in plain language or generate the code steps for me. It felt like having a senior dev looking over my shoulder, ready to help.
  • Integrated Workflow: It wasn’t some weird isolated tool; Cursor fit into my workflow. I could still use Git for version control, which supports common languages and frameworks. Plus, there are options to keep everything local for privacy (necessary when working with proprietary design data). For me, on this personal project, I didn’t mind using the cloud AI, but it’s good to know there are privacy controls.
  • Debugging Superpowers: Perhaps my favorite part – when I encountered errors (and I certainly did 🙃), I could copy the error message and paste it into Cursor’s chat, basically asking, “Why is this happening? How do I fix it?” Nine times out of ten, it would pinpoint the issue and suggest a fix right away. It saved me from lots of head-scratching and Googling.

In short, Cursor AI became my pair programmer, patiently helping me build this plugin. I was still writing the code, but with Cursor’s assistance, it was faster, and I felt more confident that I wasn’t introducing silly bugs. Now, let’s talk about how the actual coding session went down with Cursor by my side.

choosing AI agent inside Cursor AI
Step 4: Building the Plugin with AI Guidance

I had my mission laid out: use the CSV from Claude and update the Figma tokens through the plugin code. Here’s how the development process unfolded, almost like a conversation between me and the AI:

  • Setting the stage: In Cursor, I opened the chat (sometimes called the “Composer” tab when you want it to write code). I told it we’re working on a Figma plugin and described the goal: “We have a CSV of token names and descriptions. Let’s create a plugin that, when run, reads this CSV and updates each token’s description in Figma’s Variables.” I was as detailed as possible, basically explaining the task like I would to a human collaborator.
  • Choosing the AI model: Cursor allows switching between AI models (like GPT-4, GPT-3.5, or Anthropic’s Claude). Since I’d had a good experience with Claude generating the data, I decided to use Claude here as well for code generation.

  • At that time, I selected Claude-3.7 as the assistant model in the chat panel. (Claude tends to be great at following instructions for structured tasks, and it didn’t disappoint!)
  • Coding by conversation: With Claude set as the assistant, I began asking it for help. For example, I typed something like: “Create a function to load a CSV file (with two columns: token name and description) and update each matching Figma variable’s description.” Cursor (via Claude) then generated code for me. It created a snippet that used the Figma Plugin API (e.g., figma. variables, etc.) to find tokens by name and set their descriptions. It even suggested how to add a simple UI element (like a file input in ui.html) so I could upload the CSV through the plugin UI. I was pretty impressed seeing code appear that actually referenced Figma’s API correctly.
  • Reviewing and tweaking: I read through the generated code. It was mostly on point, but I tweaked a few variable names and added a bit of error handling (with Cursor’s help when needed). For instance, I asked, “How do I handle tokens in the CSV that might not exist in Figma?” and the AI adjusted the code to skip or warn about those. This felt like a collaborative jam session with the AI—like pair programming where I brainstorm, and it writes a first draft, and then I refine.
  • Multi-file edits: At one point, I needed to ensure the UI (HTML) could send the file data to the code (TypeScript). I wrote a prompt in the composer: “In ui.html, add an <input type=file> and in code.ts, listen for when a file is selected and process it.” Cursor went ahead and modified both files at once – it added the file input and also adjusted the code to handle a file change event. Seeing multiple files get updated simultaneously felt a bit like having an octopus assistant with extra arms coding everywhere. But it worked like a charm.
  • Understanding the AI’s output: Another nice touch – after generating a chunk of code, Cursor’s AI would often explain what it just wrote. For example, it would say, “I added a function updateTokensFromCSV which does X, Y, Z... and I updated the UI to include a file upload, which on change reads the file and sends its text to the code.ts via postMessage.” This was great because it ensured I understood the solution, and it doubled as documentation for later. It’s like the AI was commenting on its code for me.

In a surprisingly short time, we (my AI buddy and I) had a first version of the plugin ready to test. The real moment of truth had arrived: running the plugin in Figma to see if it actually worked.

Step 5: Debugging – When at First You Don’t Succeed… Fix It!

I fired up Figma, loaded my development plugin, and ran it. And then… nothing visible happened. Uh oh. Actually, behind the scenes, something did happen: I got a Figma notification saying there was an error. First run, first bug – not unexpected! This is where Cursor AI truly shone in the development process.

Here’s how debugging went down, step by step:

  • Catching errors: I clicked on “Show Console” in the Figma plugin development mode to see what went wrong. Sure enough, there was an error message (some undefined variable or a typo, I don’t recall the exact text, but let’s say it was something like “Cannot read property ‘find’ of undefined”). Rather than manually combing through code, I copied the error text and flipped back to Cursor’s chat.
  • Asking the AI for help: I literally pasted the error into Cursor and typed: “I got this error when running the plugin. What did I do wrong?” Claude (through Cursor) analyzed the error in seconds and pointed out the issue. It explained that I was probably trying to access something that wasn’t initialized. It suggested adding a check or ensuring the Figma variables were properly fetched before updating them. It even pinpointed the line in code that might be the culprit. Pretty neat!
  • Applying fixes: I followed the AI’s advice and fixed the code. In one case, I had misnamed a field (like using tokenName vs name), and the AI caught that. In another case, I needed to add await figma.variables.updateAsync(...) (just an example) because the Figma API was asynchronous. Cursor’s suggestions were on the money, and I applied them one by one, then ran the plugin again.
showing bugs in Figma console and prompt to fix them in Cursor AI

  • Iterating: This cycle repeated a couple of times. Each time I ran the plugin, I uncovered another edge-case bug or a small logic mistake. Instead of pulling my hair out, I went back to Cursor, described the new issue, and it guided me to a solution. At one point, the plugin UI was closing immediately after I selected the CSV (which meant the code ran and shut itself down before I could see any results). That was obviously not ideal. I asked Cursor why that might be happening. It figured out that I hadn’t told Figma to keep the plugin open (Figma plugins can close themselves after execution unless you tell them not to). The fix was to add a simple figma.ui.onmessage handler to know when to close, or keep the UI open until done. I implemented that as advised, and voila – the plugin stayed open as needed.
  • Success: After a few rounds of fix-and-test, the plugin finally ran without errors. I looked at my Figma design tokens panel and saw all the descriptions neatly updated from “(empty)” to the rich text Claude had generated. To double-check, Figma showed a little success notification in the corner, indicating the plugin finished its job. I did a little happy dance at my desk. It worked! The 200 tokens now had consistent, clear descriptions, and I didn’t have to type them all out manually. Mission accomplished.

Throughout this debugging phase, I actually started to enjoy the process. It wasn’t frustrating; it felt like a collaborative problem-solving session. Each error was just a puzzle to solve with the AI’s help. In the end, the plugin was functional and free of obvious bugs, thanks to the iterative refinement.

The Result: A Handy Plugin and Big Time Savings

When all was said and done, I had a fully functional Figma plugin that automated a once-painful task. What used to threaten a week’s worth of design time was now reduced to a quick operation I could run anytime. Here’s what the plugin does, in a nutshell:

  • It lets me upload a CSV of token names and descriptions.
  • It finds the matching tokens in our Figma design system (Variables) and updates their description field with the text from the CSV.
  • It gives a confirmation when done, so I know everything went through correctly.

Using this plugin is a breeze. Next time we introduce new tokens or need to update descriptions, I can regenerate the CSV (maybe with Claude’s help again if needed) and run the plugin. Boom — all updates done in a flash. No more tedious manual editing of each token’s description in the Figma UI.

plugin screens preview

Not only did this save my time, but it’s also going to help others. In fact, I shared the plugin with our UI UX Design team. Our company uses a design system and maintains it across several teams. Those teams can use this same plugin to manage their tokens. Even if their token set is different, they just need to feed in their own CSV and let the plugin do its thing. In a way, this little AI-assisted project of mine has multiplied productivity across the board.

Reflections: AI and the Future of Design Workflow

This journey was an eye-opener for me. I went from dreading a boring, repetitive task to enjoying the process of solving it creatively with AI tools. A few takeaways and thoughts:

  • Storytelling & Humor: I found that approaching the task playfully (like treating the AI as a collaborator) made the process less daunting. I literally chatted with Cursor as if it were a colleague: “Oops, that didn’t work, let’s fix it.” This humanized the experience and kept me engaged.
  • Empowering, not Replacing: As a designer, I’m not a coding ninja, but with AI help I was able to create a pretty sophisticated tool. AI didn’t replace my role in this—it augmented it. I still made decisions, provided context, and verified the outputs. The AI just took care of the grunt work and answered my questions on the fly.
  • Speed and Efficiency: The time savings are undeniable. What used to take days now takes hours or minutes. This means I can focus more on actual design and creative problem-solving, rather than mundane update tasks. It’s like having an intern who works at superhuman speed and never complains (except this “intern” sometimes needs very explicit instructions 😅).
  • Learning Curve: I also learned a ton in the process. By reading the code Cursor generated and the explanations it gave, I picked up new tricks for Figma’s API and better coding practices. It was like on-the-job training. Next time, I’ll be even more prepared (and I know I have an AI safety net if I get stuck).

To wrap up, building this Figma plugin with AI was not just a one-off hack, but a glimpse into how our workflows might evolve. I genuinely felt like I had a partner working with me, one who could handle both creative and technical tasks. It’s exciting to think where this could lead: designers empowered to create tools without waiting on developers, and developers automating away the boring parts of their work to focus on innovation. The lines between roles blur a bit, and collaboration (human-AI collaboration in this case) becomes the superpower.

If you’ve read this far, thanks for coming along on this journey with me! I hope my story gave you some insight (and maybe a few laughs or “aha” moments) about integrating AI into design workflows. Whether you’re a designer, a developer, or just AI-curious, give these tools a try in your own projects. You might be surprised at just how much you can accomplish when you pair up with a helpful AI.

Happy designing, and don’t be afraid to let robots do the boring stuff!