"Is your project adopting the CI/CD development culture, and you have some Postman projects that you don't know how to run remotely as an automated quality gate for your CI pipeline? Well, if you follow me in this article, you will discover how to do so."

Including Postman in CI
Before you dive into this, you have a few prerequisites:
- https://nodejs.org/en/ (Download the latest version);
- A test agent (where you can log on) or an agent that has npm as capabilities. (In this case, you can skip the installation of NodeJS).
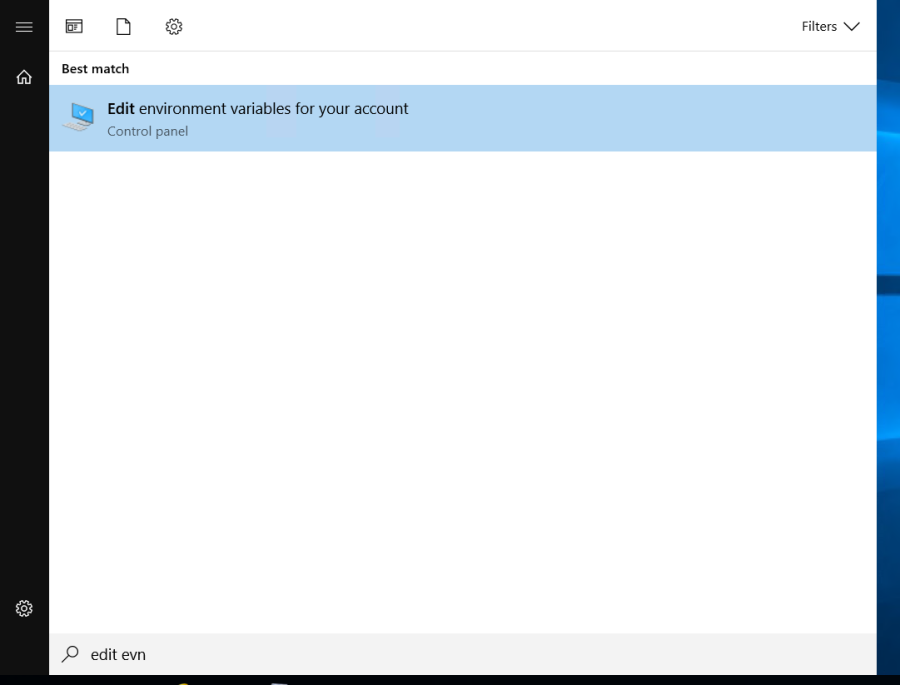
The first step of including the Postman projects in continuous integration is to install the NodeJS on the test agent. First login with the same user that the test agent logins with and install NodeJS on that machine. To make sure it was properly installed, type in the windows search bar: "Edit environment variables" and select the second option for the current user.
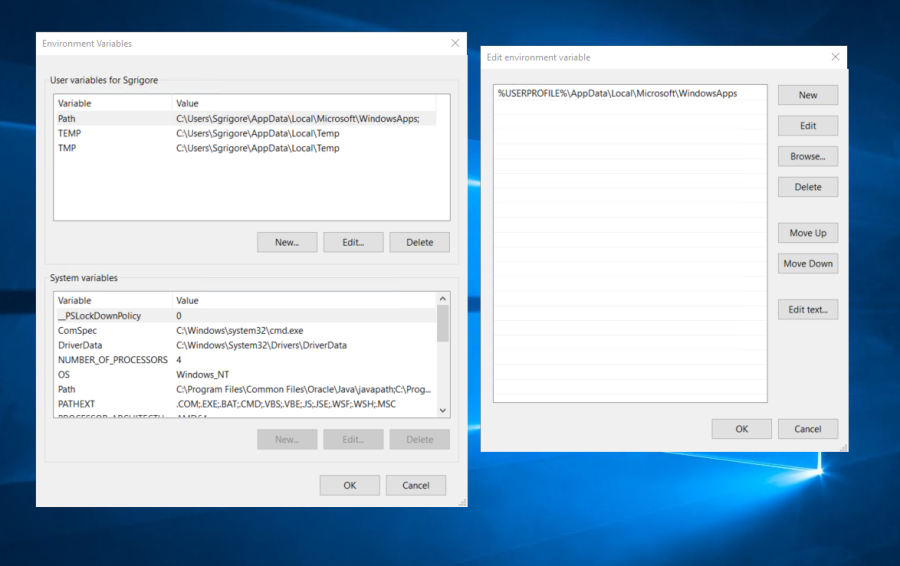
And then look for the PATH variable and make sure npm location is part of it.
A restart is required for the NodeJS to successfully finish the installation and for the test agent to "acquire" the npm capability.
The next step after these infrastructure ones is to create our pipeline. And to do this, we will need an artifact. We chose a build like the one seen below, or you create it if you do not have one.
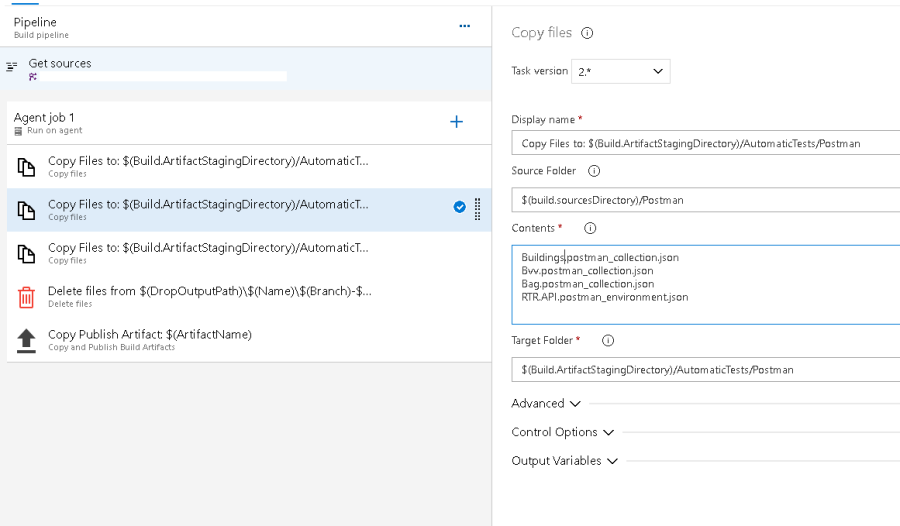
In summary, what you do in this particular build is you delete the old artifacts; you copy the Postman (in our case) projects from Azure DevOps (basically what it is written in the „Contents"), and add them to the target folder. And the last step is to publish the artifacts, so the test agent is capable to reach the Postman projects.
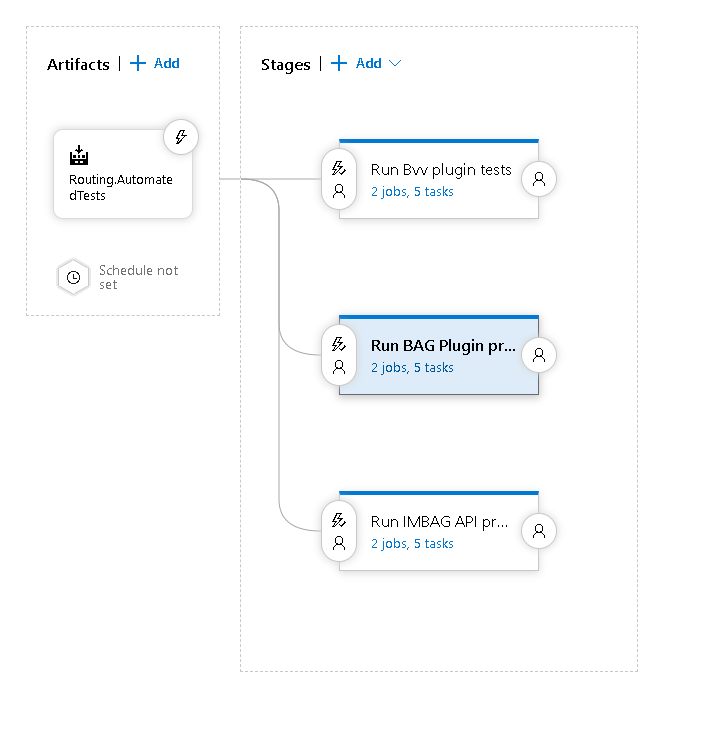
Now you can create a pipeline for these tests. After you have created the blank one, you can add as an artifact the build that we just created a few moments later as such:
Since you have an artifact, you can create a blank stage with the following steps.
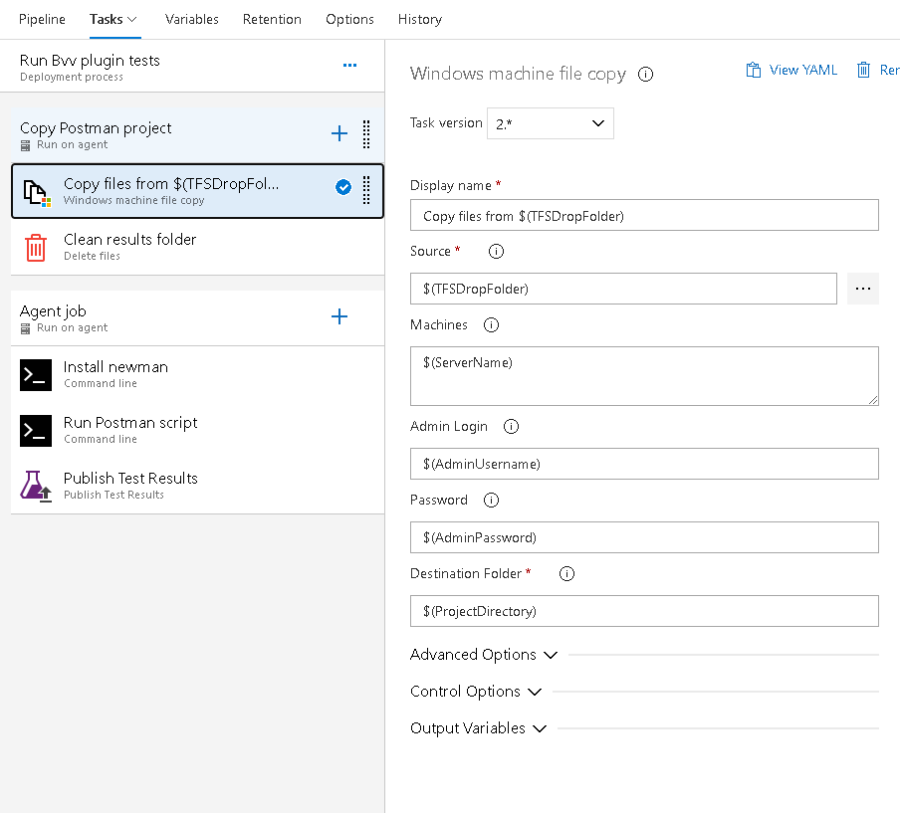
- The first step is to copy the artifact files to the test agent so the run step can easily access the projects.
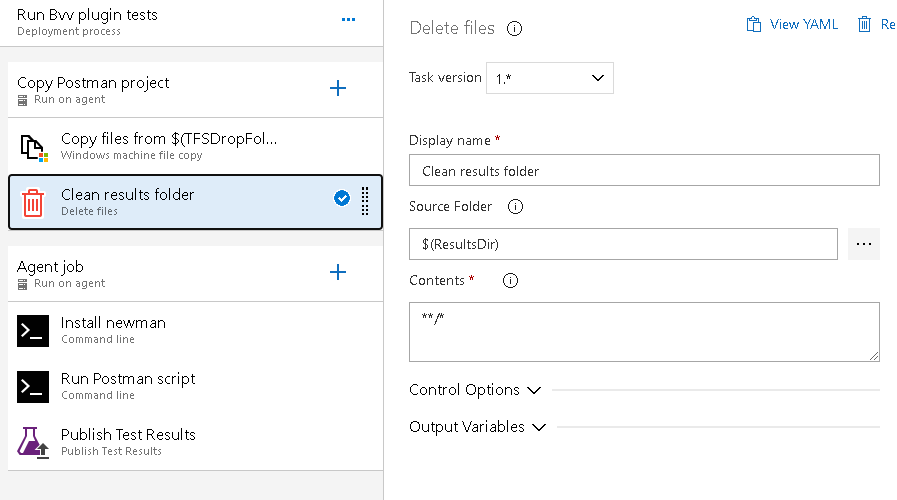
- The second one will delete the results from previous releases (of the same pipeline).
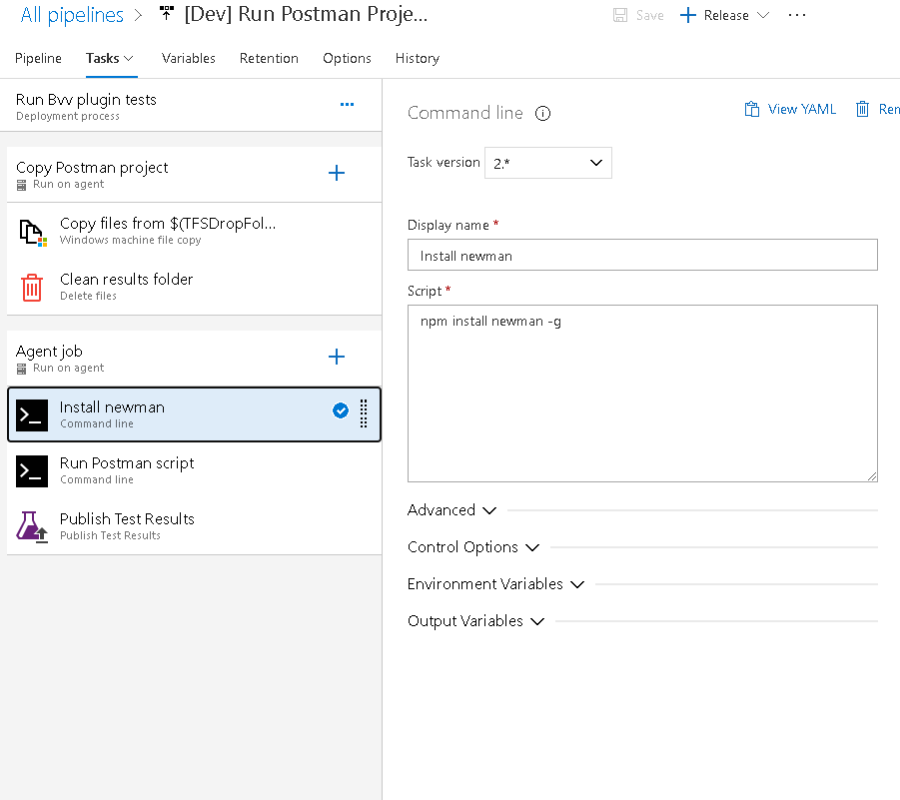
Furthermore, you can add a new agent job for the execution of the Postman project. And within this job, the first step is to install the Newman packages through npm. Newman is a test runner used for Postman projects.
Note: Newman test runner can be used for SoapUI projects as well.
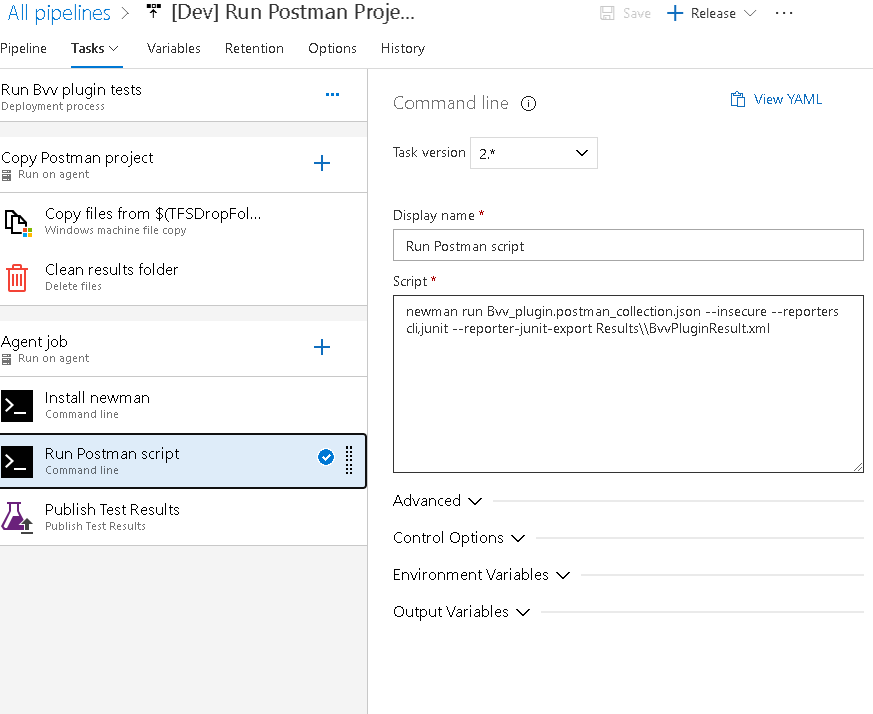
After installing the Newman test runner, you can execute the following script to run the Postman project you desire.
Command:
newman run YourProject.json --reporters cli,junit --reporter-junit-export FolderForResults
Note that if we execute the Postman project against an environment without a secure connection, we have to use the argument --insecure, which will disable the strict SSL.
And the last step of this job is the Publish of Test Results. The format of test results should be JUnit (if you used this in the previous step) and you should add the name of the result file and the path to it (same one is used in the previous step).
Note: This Result.XML can be placed as a variable, to not have it misspelled in any script.
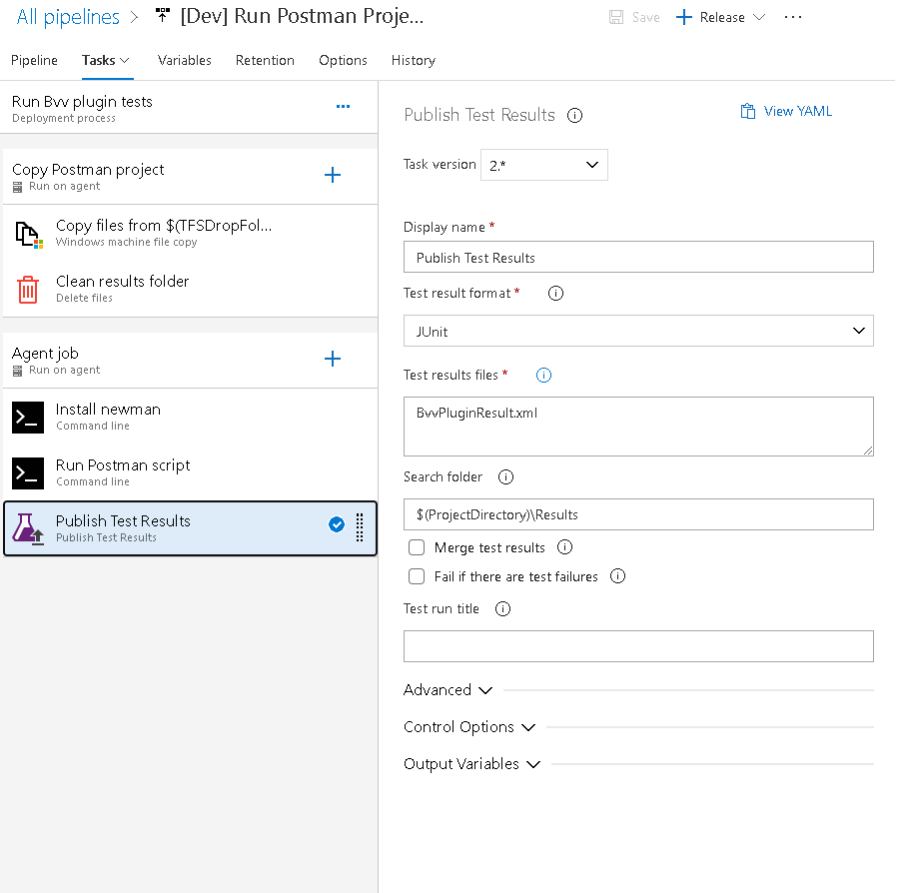
A note for the last step is to go to the Control Options and select for the "Run this task" the value "Even if a previous task has failed unless the deployment was canceled". By doing so the pipeline will publish the results even if the Postman tests have failed, otherwise, the results will not be published in the Tests tab. And that is it! I hope it helped!
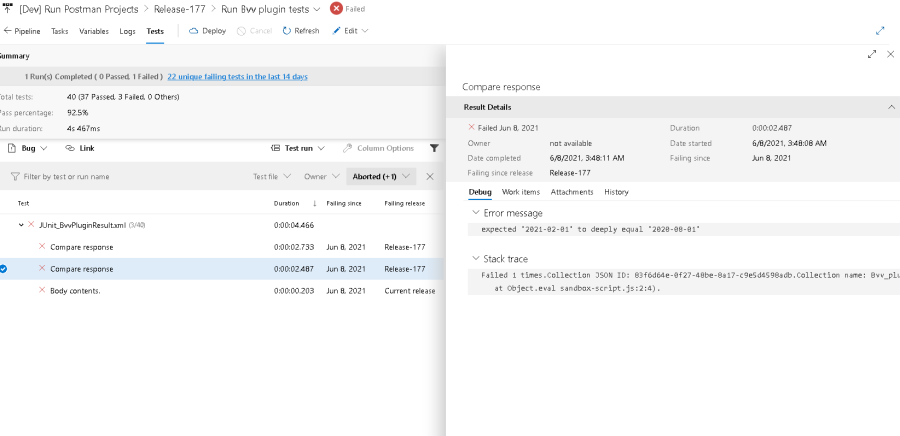
And as with every test, the assert part is particularly important and if you have some tests that fail in your pipeline, you can see the percentage that failed, what tests have failed and where it has failed, as seen below. To reach the report below, you will need to click the logs on your pipeline and select the "Tests" tab.
Note:
- If you wish to run the Postman projects on multiple branches/environments, you will need to parameterize requests within projects with an environment variable as seen below. (Ex: BaseURL/api/books)
- After creating the environment and its variables, you will need to export them and add them in Azure DevOps and to the build along with your Postman projects.
- After these actions are completed, you will need to change in the pipeline the "Run Postman script" step with the following command:
newman run YourProject.json -e ExportedEnvVariables.json --env-var "variableToBeChanged=$(ActualValueThatYouWant)" --reporters cli,junit --reporter-junit-export Results\Result.xml
- The "$(ActualValueThatYouWant)" is a variable defined in the pipeline variables.

